Curvilinear Forms can be some of the toughest things to sketch in perspective, but when you nail it they can shine for you. This technique reaches back to my first Visualization class with Dave Fleming at San Jose States Industrial Design Dept. Follow each step, and you will learn to build 3D curvilinear forms on paper!

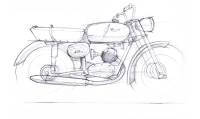
1. Perspective, Proportions and Connections: Sketch your initial box forms. Take a look at the proportions of the two boxes in relationship to each other (they are the major bodies of the object). Once you are happy with the proportions, connect the two boxes, and find the center line of both boxes.

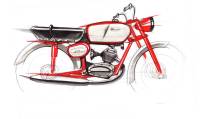
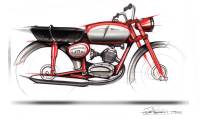
2) Contour lines, Center lines, Radi and More: Use your sketch from step one asn an underlay to make the second sketch. Lightly ghost the key points from the original sketch (as visual reference). Start to “shape” the boxes into softer forms, paying attentions to the outside profile to maintain the correct perspective position of those curves. Use crossing contour lines to help describe to your eye how you see those new shapes. Add curves and Radi based off of those contour lines. Make sure that the center lines now live on both forms.

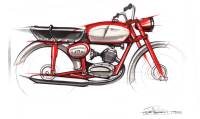
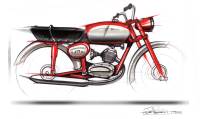
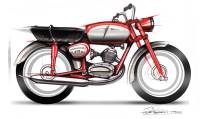
3) Final Shape, Details Texture and Preparation: Use the sketch from step 2 to help create your final shape. Adjust curves and contours to fit your design, always referencing your previous sketch. Place key details that play a big part in the design on the object, always looking to see if center lines/ contour lines hit those objects (this can help play up certain details). Always follow the surfaces you have built to make details more realistic. Add textures if necessary to separate forms, and the sketch is prepared for value and shading!
Enjoy!


![3628692459_fb755191a7[1]](https://live.staticflickr.com/2581/3682050553_72c5080af1_s.jpg "3628692459_fb755191a7[1]")
![3628695853_a1e6a40195[1]](https://live.staticflickr.com/3568/3682863860_b7c69e3aea_s.jpg "3628695853_a1e6a40195[1]")
![3629536468_4c1c67e0c2[1]](https://live.staticflickr.com/2470/3682050349_88c7a10598_s.jpg "3629536468_4c1c67e0c2[1]")
